
No-Bake 4-Ingredient Peanut Butter Balls Recipe
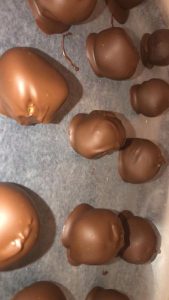
These delicious peanut butter balls taste just like a Reese’s cup, but they’re easier to make! With only four ingredients and no baking required, they’re the perfect treat for any peanut butter lover. They might not be the prettiest, but they’ll definitely hit the spot!
Ingredients:
- ½ cup creamy peanut butter
- 1 cup powdered sugar
- 3 tablespoons softened butter
- Milk chocolate melting wafers
Instructions:
- Mix the Ingredients:
In a large bowl, combine the creamy peanut butter, powdered sugar, and softened butter. For best results, mix using your hands (wearing gloves) to thoroughly blend the ingredients together until a smooth dough forms. - Shape into Balls:
Line a cookie sheet with wax paper. Roll the mixture into small, bite-sized balls and place them onto the prepared cookie sheet. - Freeze the Balls:
Insert toothpicks into the top of each peanut butter ball to make dipping easier. Freeze for 30 minutes or until the balls are firm. - Dip in Chocolate:
Melt the milk chocolate wafers in a microwave-safe bowl in 20-second intervals, stirring between each interval until smooth. Dip each frozen peanut butter ball into the melted chocolate, using the toothpick for easy handling. Allow any excess chocolate to drip off before placing them back onto the wax paper. - Refrigerate to Set:
Place the chocolate-dipped peanut butter balls in the refrigerator for about 20 minutes, or until the chocolate hardens. - Enjoy!
Serve these rich and creamy treats as a stand-alone dessert, or pair them with a scoop of vanilla bean ice cream for an extra indulgent treat!
Helpful Tips:
- Make it Your Own: Add a sprinkle of sea salt on top for a sweet-and-salty twist!
- Storage: Store these peanut butter balls in an airtight container in the refrigerator for up to 1 week.
- Dipping Alternative: If you don’t have toothpicks, you can use a fork or skewer to help dip each ball.
Enjoy the irresistible combination of creamy peanut butter and rich milk chocolate!
20 Tips for Making Perfect No-Bake Peanut Butter Balls
- Choose the Right Peanut Butter:
Use creamy, store-bought peanut butter (like Jif or Skippy) for the best texture. Avoid natural peanut butter, as the oil separation can make the mixture too loose. - Soft Butter is Key:
Make sure the butter is softened to room temperature. This helps the mixture blend smoothly and prevents clumps. - Don’t Skip Freezing Before Dipping:
Freezing the peanut butter balls for at least 30 minutes helps them maintain their shape when dipped in melted chocolate. - Use Gloves for Mixing:
Mixing the dough by hand can be sticky, so wearing gloves will make it easier and less messy. - Test the Dough Texture:
If the mixture is too sticky to roll into balls, add a bit more powdered sugar, 1 tablespoon at a time, until it firms up. - Adjust Sweetness as Needed:
Taste the mixture before rolling into balls. If you want a sweeter filling, add more powdered sugar; if you want it less sweet, reduce the sugar slightly. - Wax Paper or Parchment Paper is a Must:
Use wax or parchment paper to line your cookie sheet. This prevents sticking and makes for easy cleanup. - Size Consistency:
Roll the balls uniformly so they freeze and dip evenly. A small cookie scoop can help achieve even sizing. - Use a Toothpick for Easy Dipping:
Sticking a toothpick into each ball before freezing makes it much easier to dip in the melted chocolate without mess. - Melting Chocolate Properly:
Melt the chocolate in short bursts in the microwave (20 seconds at a time) to avoid burning. Stir in between until smooth. - Choose the Right Chocolate:
Use high-quality milk chocolate melting wafers or chocolate chips. Avoid baking chocolate as it can be harder to melt evenly. - Add a Drop of Oil:
If your chocolate is too thick for dipping, add a drop of vegetable oil or coconut oil to thin it out for a smoother coating. - Drip Off Excess Chocolate:
After dipping each ball, let the excess chocolate drip off by gently tapping the toothpick against the side of the bowl. - Refrigerate, Don’t Freeze:
Once dipped, refrigerate the peanut butter balls to set the chocolate. Freezing can cause the chocolate to crack. - Decorative Touches:
Before the chocolate hardens, sprinkle some chopped nuts, sprinkles, or sea salt on top for an added crunch and visual appeal. - Use a Fork if Toothpicks Break:
If a toothpick breaks, switch to using a fork for dipping. Let the excess chocolate drip through the fork prongs. - Prevent Cracks in Chocolate:
Let the peanut butter balls warm up for a couple of minutes after freezing before dipping to prevent the chocolate coating from cracking. - Double Dip for a Thicker Shell:
For a thicker chocolate coating, dip the balls once, let them set, and then dip them again. - Work Quickly:
When dipping in chocolate, work quickly to prevent the chocolate from hardening in the bowl. - Store Properly:
Keep these treats in the fridge in an airtight container for up to a week, or freeze them for up to 3 months!
20 Frequently Asked Questions About No-Bake Peanut Butter Balls
- Q: Can I use chunky peanut butter instead of creamy?
A: Yes, but it will change the texture and might make it harder to roll. If you prefer a bit of crunch, go for it! - Q: Why is my mixture too soft to roll into balls?
A: This could be due to the peanut butter being too runny or the butter being melted instead of softened. Add a little more powdered sugar until the mixture firms up. - Q: Can I substitute margarine for butter?
A: Margarine can work, but the flavor and texture might differ. Butter provides a richer taste and creamier texture. - Q: What if I don’t have milk chocolate wafers?
A: You can use semi-sweet chocolate chips, dark chocolate, or even white chocolate for dipping! - Q: How long can I store these peanut butter balls?
A: They’ll stay fresh in the refrigerator for up to a week. If you freeze them, they’ll last for up to 3 months. - Q: Can I make these dairy-free?
A: Yes, use a dairy-free butter substitute and dairy-free chocolate chips for dipping. - Q: Why does my chocolate coating crack?
A: This happens when the peanut butter balls are too cold, and the chocolate sets too quickly. Let the balls sit for a few minutes at room temperature before dipping. - Q: Do I have to use powdered sugar?
A: Yes, powdered sugar gives the right sweetness and texture. Granulated sugar won’t dissolve properly. - Q: Can I add other ingredients to the filling?
A: Definitely! You can mix in crushed graham crackers, mini chocolate chips, or shredded coconut for added texture and flavor. - Q: Can I make these into bars instead of balls?
A: Yes, press the mixture into a lined baking dish, freeze, and then pour melted chocolate over the top. Slice into bars after chilling. - Q: What’s the best way to melt chocolate without burning it?
A: Use the microwave in 20-second bursts, stirring in between. Alternatively, use a double boiler on the stovetop. - Q: Can I use almond or sunflower butter instead?
A: Yes, any nut or seed butter can be substituted, but the flavor and texture will change slightly. - Q: Why are my peanut butter balls sticking to my hands?
A: Try chilling the dough for 10 minutes before rolling or use gloves to reduce stickiness. - Q: Can I use less sugar in the recipe?
A: Reducing the powdered sugar will alter the consistency, making the mixture harder to roll. If you want them less sweet, start by reducing just a little and adjust as needed. - Q: What if I don’t have toothpicks for dipping?
A: Use a fork or a skewer, or place the balls on a fork to dip them in the chocolate. - Q: Can I make these in advance for a party?
A: Absolutely! Make them up to a week in advance and store them in the refrigerator. - Q: Why do my balls fall apart when I dip them?
A: The mixture might be too dry. Add a little more peanut butter to help bind it together. - Q: Can I use candy melts instead of chocolate wafers?
A: Yes, candy melts will work and come in various colors, making them great for themed treats. - Q: How can I prevent the chocolate from getting too thick?
A: Add a small amount of oil (vegetable or coconut) to thin it out if needed. - Q: Can I flavor the filling?
A: Yes, add a drop of vanilla extract or a pinch of cinnamon to enhance the flavor!