Savory Bisquick Sausage Balls: A Comforting Classic
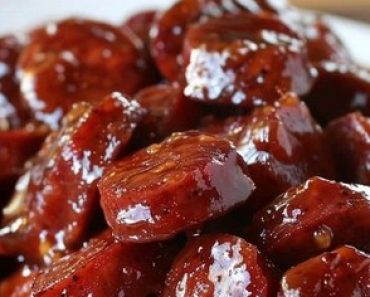
Indulge in the timeless charm of Bisquick Sausage Balls, a recipe that perfectly balances savory flavors with a hint of cheesy goodness. Ideal for breakfast, brunch, or even as a party appetizer, these sausage balls are both comforting and convenient. Crafted with love and a touch of garlic, they promise to be a hit at any gathering. Let’s dive into making these delightful bites that bring warmth and satisfaction with every bite.
Ingredients Overview
Breakfast Sausage (1 lb):
- Choose your favorite brand of breakfast sausage, whether it’s spicy or mild, to customize the flavor profile to your liking.
Bisquick (2 cups):
- This versatile baking mix forms the base of the sausage balls, providing a light and fluffy texture.
Garlic Powder (1 tsp):
- Adds a subtle hint of garlic, enhancing the overall savory taste.
Milk (¼ cup):
- A splash of milk helps bind the ingredients together, ensuring the balls are moist and tender.
Mild Cheddar Cheese (1 ½ cups, shredded):
- Shredded cheddar cheese melts into the sausage balls, creating a rich and cheesy interior.
Step-by-Step Cooking Instructions
Prepare the Mixture:
- Combine Ingredients: In a large mixing bowl, mix together the breakfast sausage, Bisquick, garlic powder, milk, and shredded cheddar cheese. Use your hands to ensure all ingredients are thoroughly combined.
Form the Balls: 2. Scoop the Dough: Using a medium cookie scoop (about 1 ½ tablespoons), scoop the dough into uniform portions. 3. Roll into Balls: Roll each portion in your hands to form a round shape, ensuring they cook evenly.
Preheat the Air Fryer: 4. Set the Temperature: Preheat your air fryer to 360°F (for Ninja Foodi) or 370°F (for Cosori). This ensures the sausage balls cook evenly and achieve a nice, golden-brown exterior.
Cook the Sausage Balls: 5. Line the Basket: Line the air fryer basket with parchment paper to prevent sticking. 6. Arrange the Balls: Place the sausage balls in the air fryer basket, leaving enough space between them for even cooking. 7. Air Fry: Cook for 8 to 10 minutes (Ninja Foodi) or 8 to 9 minutes (Cosori), or until the internal temperature of the balls reaches 165°F.
Cool and Serve: 8. Cool Slightly: Place the cooked sausage balls on a cooling rack for a few minutes to set. 9. Enjoy: Serve warm and enjoy the savory, cheesy goodness of these Bisquick sausage balls.
Storage and Reheating Tips
Storage:
- Refrigeration: Store any leftovers in an airtight container in the refrigerator for up to 3 days.
- Freezing: To freeze, place the cooled sausage balls on a baking sheet and freeze until solid. Then transfer to a freezer-safe bag or container. They can be frozen for up to 3 months.
Reheating:
- Microwave: Reheat in the microwave for 30-45 seconds until warmed through.
- Air Fryer: Reheat in the air fryer at 350°F for 3-5 minutes for a crispier texture.
Helpful Tips for Enhancing the Recipe
Use Fresh Sausage: Opt for high-quality, fresh breakfast sausage for the best flavor.
Grate Your Own Cheese: Freshly grated cheese melts better and tastes superior to pre-shredded cheese.
Spice It Up: Add a pinch of red pepper flakes or use spicy sausage for a bit of heat.
Herbs: Incorporate fresh herbs like parsley or chives for added freshness and color.
Consistency: Ensure the mixture is well-combined to avoid dry spots and ensure even cooking.
Non-Stick Parchment: Use non-stick parchment paper to prevent sticking and make cleanup easier.
Rest the Dough: Let the mixture sit for a few minutes before scooping to allow the flavors to meld together.
Test One First: Cook one sausage ball initially to check seasoning and adjust if necessary.
Serve with Dipping Sauce: Pair with mustard, ranch, or your favorite dipping sauce for extra flavor.
Batch Cooking: Double the recipe and freeze half for a quick and easy snack later.
Popular Questions and Answers
Can I use a different type of cheese?
- Yes: Feel free to experiment with different cheeses like Monterey Jack, mozzarella, or pepper jack for a unique twist.
Can I bake these instead of using an air fryer?
- Absolutely: Bake at 375°F for 20-25 minutes, or until the internal temperature reaches 165°F.
How do I keep the sausage balls from falling apart?
- Ensure Proper Mixing: Make sure the mixture is well-combined and moist. Adding a bit more milk if the mixture is too dry can help.
Can I make these ahead of time?
- Yes: Prepare the mixture and form the balls, then refrigerate for up to 24 hours before cooking.
What type of sausage works best?
- Variety: Both mild and spicy breakfast sausages work well. Choose based on your preference.
Can I make these gluten-free?
- Yes: Use a gluten-free baking mix in place of Bisquick.
What if I don’t have garlic powder?
- Alternative: Substitute with finely minced fresh garlic or omit if necessary.
Can I add vegetables?
- Sure: Finely diced bell peppers or onions can be added for extra flavor and texture.
How do I know when they are done?
- Temperature: Use a meat thermometer to ensure the internal temperature reaches 165°F.
Can I use pre-cooked sausage?
- Not Recommended: Raw sausage is best as it binds better with the other ingredients during cooking.
Secrets for Achieving Culinary Perfection
Quality Ingredients: Start with high-quality sausage and cheese for the best flavor.
Proper Mixing: Mix until all ingredients are fully incorporated to avoid dry spots.
Uniform Size: Use a cookie scoop for even-sized sausage balls to ensure they cook evenly.
Preheating the Air Fryer: Always preheat your air fryer for the best results.
Spacing: Don’t overcrowd the air fryer basket; leave space between each sausage ball.
Check Doneness: Always check the internal temperature to ensure they are fully cooked.
Serve Warm: These sausage balls are best enjoyed warm, right out of the air fryer.
Fresh Herbs: Add fresh herbs for a burst of flavor and a pop of color.
Adjust Seasoning: Taste the mixture before forming into balls to adjust seasoning as needed.
Creative Dips: Serve with a variety of dipping sauces to complement the flavors.
Patience: Let the sausage balls cool slightly before serving to avoid burning your mouth and to allow flavors to set.
With these tips and detailed instructions, you’re ready to create a batch of Bisquick Sausage Balls that will impress and delight everyone who tries them. Enjoy the process and the delicious results


