
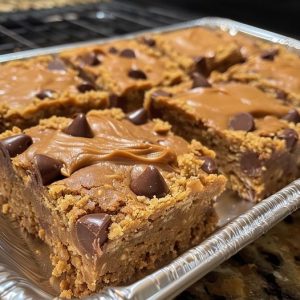
Peanut Butter Lunch Lady Cookie Bars
Indulge in the comforting embrace of these Peanut Butter Lunch Lady Cookie Bars, a delightful blend of creamy peanut butter and rich chocolate chips. Perfect for sharing with loved ones or savoring solo with a warm beverage, these bars are bound to become a favorite in your recipe collection.
Ingredients Overview
Unsalted Butter: Softened to create a rich and creamy base. Granulated Sugar & Brown Sugar: A sweet combination for a perfectly balanced flavor. Large Eggs: Adds structure and richness. Vanilla Extract: Enhances the overall flavor. Creamy Peanut Butter: The star ingredient, providing that irresistible nutty taste. All-Purpose Flour: The foundation for the cookie bars. Baking Soda: Ensures a perfect rise and texture. Salt: Balances the sweetness. Semi-Sweet Chocolate Chips: For those delightful bursts of chocolate in every bite.
Step-by-Step Cooking Instructions
Step 1: Preheat the Oven
Preheat your oven to 350°F (175°C) and grease a 9×13 inch baking pan. This ensures your cookie bars bake evenly and come out of the pan easily.
Step 2: Cream the Butter and Sugars
In a large mixing bowl, cream together the softened butter, granulated sugar, and brown sugar until the mixture is light and fluffy. This should take about 3-5 minutes.
Step 3: Add Eggs and Flavorings
Add the eggs one at a time, mixing well after each addition. This ensures they are fully incorporated. Then, stir in the vanilla extract and creamy peanut butter until well combined.
Step 4: Combine Dry Ingredients
In a separate bowl, whisk together the flour, baking soda, and salt. Gradually add these dry ingredients to the wet ingredients, mixing until just combined. Avoid overmixing to keep the bars tender.
Step 5: Fold in Chocolate Chips
Gently fold in the semi-sweet chocolate chips until they are evenly distributed throughout the dough.
Step 6: Spread the Dough
Spread the dough into the prepared baking pan, smoothing the top with a spatula to ensure an even bake.
Step 7: Bake
Bake in the preheated oven for 25-30 minutes, or until the edges are golden brown and a toothpick inserted into the center comes out clean. Be careful not to overbake to keep the bars moist.
Step 8: Cool and Cut
Allow the bars to cool in the pan before cutting them into squares. This step is crucial to ensure they hold their shape.
Step 9: Serve and Enjoy
Enjoy these delicious Peanut Butter Lunch Lady Cookie Bars with a glass of milk or your favorite hot beverage!
Cooking Tips
Tip 1: Use Room Temperature Ingredients: For better blending and texture. Tip 2: Line the Pan with Parchment Paper: For easy removal and cleanup. Tip 3: Don’t Overmix: To keep the bars tender and soft. Tip 4: Chill the Dough: For thicker, chewier bars. Tip 5: Add a Pinch of Cinnamon: For a warm, spiced flavor.
Storage and Reheating Tips
Storage: Store in an airtight container at room temperature for up to 5 days or in the refrigerator for up to a week. Reheating: Microwave individual bars for 10-15 seconds for a warm, gooey treat.
Frequently Asked Questions
Q1: Can I use crunchy peanut butter instead of creamy?
A1: Yes, it will add a delightful crunch to your bars.
Q2: Can I substitute the semi-sweet chocolate chips with milk chocolate chips?
A2: Absolutely! It will make the bars sweeter.
Q3: How do I make these bars gluten-free?
A3: Use a gluten-free all-purpose flour blend.
Q4: Can I freeze these bars?
A4: Yes, wrap them tightly and freeze for up to 3 months.
Q5: What can I use instead of eggs?
A5: Substitute each egg with 1/4 cup of unsweetened applesauce or a flax egg.
Q6: Can I add nuts to this recipe?
A6: Yes, chopped peanuts or walnuts would be great additions.
Q7: How can I make these bars chewier?
A7: Slightly underbake them by a few minutes.
Q8: Can I double this recipe?
A8: Yes, use a larger pan or bake in two batches.
Q9: What other mix-ins can I add?
A9: Try adding toffee bits, coconut flakes, or dried fruit.
Q10: How do I know when the bars are done?
A10: The edges should be golden brown and a toothpick inserted into the center should come out clean.
Q11: Can I use natural peanut butter?
A11: Yes, but make sure to mix it well to incorporate the oils.
Q12: How do I prevent the bars from becoming too dry?
A12: Be careful not to overbake and store them properly.
Q13: Can I use a different size pan?
A13: Yes, but adjust the baking time accordingly.
Q14: Are these bars suitable for a peanut allergy?
A14: Unfortunately, no. For a peanut-free version, use almond butter or sunflower seed butter.
Q15: How do I make the bars more flavorful?
A15: Add a teaspoon of cinnamon or a splash of espresso.
Q16: Can I make these bars dairy-free?
A16: Substitute the butter with a plant-based alternative and use dairy-free chocolate chips.
Q17: What is the best way to cut the bars neatly?
A17: Use a sharp knife and wipe it clean between cuts.
Q18: Can I add oats to this recipe?
A18: Yes, replace 1/2 cup of flour with rolled oats for a heartier texture.
Q19: How can I make these bars healthier?
A19: Use whole wheat flour and reduce the sugar by 1/4 cup each.
Q20: Can I add a frosting or glaze?
A20: Absolutely! A simple chocolate or peanut butter glaze would be delicious.
20 Secrets for Culinary Perfection
- Use High-Quality Peanut Butter: For the best flavor.
- Don’t Overmix the Dough: To keep the bars soft.
- Add a Touch of Sea Salt: To enhance the sweetness.
- Chill the Dough Before Baking: For thicker bars.
- Use a Combination of Sugars: For a balanced sweetness.
- Incorporate a Splash of Espresso: To deepen the chocolate flavor.
- Add a Teaspoon of Cinnamon: For a warm, spiced note.
- Use a Parchment Paper Liner: For easy removal.
- Mix in Additional Extracts: Like almond or maple for a unique twist.
- Fold in Extra Mix-Ins: Like coconut flakes or dried fruit.
- Underbake Slightly: For a chewier texture.
- Use Room Temperature Ingredients: For better blending.
- Let Bars Cool Completely: Before cutting to keep them intact.
- Try Different Nut Butters: Like almond or cashew for variety.
- Store Properly: In an airtight container to maintain freshness.
- Use a Sharp Knife: For clean cuts.
- Experiment with Different Chocolate Chips: Like white or dark chocolate.
- Add a Drizzle of Melted Chocolate: For extra decadence.
- Use a Combination of Flours: For different textures.
- Taste the Dough: Adjust sweetness or saltiness as needed.
Indulge in the delightful simplicity of these Peanut Butter Lunch Lady Cookie Bars, and enjoy the process as much as the final product!