
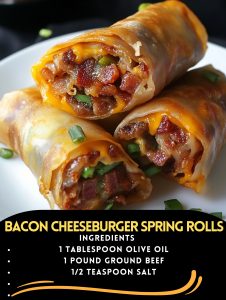
Bacon Cheeseburger Spring Rolls Recipe
Imagine the savory goodness of a classic bacon cheeseburger, but with a unique twist — all that deliciousness wrapped in a crispy, golden spring roll! These Bacon Cheeseburger Spring Rolls are a perfect fusion of American comfort food and Asian-inspired cuisine. They make an excellent appetizer, snack, or party food, bringing together the rich flavors of ground beef, crispy bacon, gooey cheese, and tangy pickles. Serve them with a creamy dipping sauce, and you’ve got a delightful treat that’s sure to please everyone at the table.
Ingredients Overview
- Olive Oil (1 tablespoon): Used to sauté the ground beef, giving it a nice sear and preventing it from sticking to the skillet.
- Ground Beef (1 pound): The star of the filling, providing a hearty and savory base. Choose a lean ground beef to keep the rolls from becoming too greasy.
- Salt (1/2 teaspoon) & Black Pepper (1/2 teaspoon): Essential seasonings to enhance the flavor of the beef.
- Garlic Powder (1/2 teaspoon) & Onion Powder (1/2 teaspoon): These spices add depth and a hint of sweetness to the filling.
- Cooked Bacon (1 cup, crumbled): Adds a smoky, crispy element that complements the ground beef perfectly.
- Shredded Cheddar Cheese (1 cup): The gooey, melty cheese binds the filling together and brings the cheeseburger flavor to life.
- Diced Dill Pickles (1/2 cup): Provides a tangy crunch that cuts through the richness of the beef and cheese.
- Ketchup (1/2 cup) & Mustard (1/4 cup): These classic condiments add a zesty sweetness and a touch of heat, blending all the flavors harmoniously.
- Spring Roll Wrappers (10-12): Thin, delicate wrappers that crisp up beautifully when fried, enclosing all the cheeseburger goodness inside.
- Egg (1, beaten): Acts as a sealant to keep the spring rolls tightly wrapped during frying.
- Vegetable Oil (for frying): A neutral oil that heats to the perfect frying temperature, ensuring the rolls are crispy and golden.
For the Dipping Sauce (Optional):
- Mayonnaise (1/2 cup): Creamy base for the dipping sauce, balancing the tangy flavors.
- Ketchup (1/4 cup): Adds sweetness and a familiar cheeseburger flavor to the sauce.
- Pickle Relish (1 tablespoon): Provides a bit of texture and tang.
- Mustard (1 teaspoon): Adds a subtle kick to the sauce.
- Salt and Pepper (to taste): Adjusts the seasoning to enhance all the flavors.
Step-by-Step Cooking Instructions
1. Prepare the Cheeseburger Filling
Cook Ground Beef:
In a large skillet, heat the olive oil over medium-high heat. Add the ground beef, salt, black pepper, garlic powder, and onion powder. Cook, stirring occasionally, until the beef is browned and fully cooked, about 5-7 minutes. Make sure to break up any large chunks with a spatula for an even texture. Once cooked, drain any excess fat to prevent the filling from becoming too greasy.
Add Bacon and Cheese:
Reduce the heat to low and stir in the crumbled bacon and shredded cheddar cheese. Continue stirring until the cheese melts and the mixture is well combined, creating a gooey, cohesive filling. Remove from heat.
Mix in Pickles and Sauces:
Stir in the diced dill pickles, ketchup, and mustard until evenly distributed throughout the beef mixture. Let the mixture cool slightly before assembling the spring rolls. This step is crucial as it ensures the wrappers do not become soggy.
2. Assemble the Spring Rolls
Prepare Work Surface:
Lay a spring roll wrapper on a clean, dry surface with one corner facing you, creating a diamond shape.
Add Filling:
Place 2-3 tablespoons of the cooled cheeseburger mixture onto the center of the wrapper.
Fold and Seal:
Fold the bottom corner of the wrapper over the filling, then fold in the sides. Roll the wrapper tightly, ensuring a snug fit around the filling. Brush the top corner with a little beaten egg and press to seal. Repeat with the remaining wrappers and filling.
3. Fry the Spring Rolls
Heat Oil:
In a deep skillet or pot, heat about 2 inches of vegetable oil to 350°F (175°C). To test if the oil is hot enough, drop a small piece of wrapper into the oil; it should sizzle immediately.
Fry Spring Rolls:
Carefully place the spring rolls in the hot oil, frying in batches to avoid overcrowding. Fry for 2-3 minutes per batch, turning occasionally, until they are golden brown and crispy.
Drain and Cool:
Remove the spring rolls with a slotted spoon and transfer them to a paper towel-lined plate to drain excess oil. Let them cool for a few minutes before serving to avoid burning your mouth with the hot filling.
4. Prepare the Dipping Sauce (Optional)
Mix Sauce Ingredients:
In a small bowl, whisk together the mayonnaise, ketchup, pickle relish, mustard, and salt and pepper to taste. Adjust the seasoning to your preference.
5. Serve and Enjoy
Serve:
Arrange the bacon cheeseburger spring rolls on a serving platter and serve hot with the dipping sauce on the side. Enjoy the delicious crunch and savory filling!
Valuable Tips for a Seamless Cooking Experience
1. Keep the Filling Cool:
Ensure the cheeseburger filling is cool before wrapping. Warm filling can cause the spring roll wrappers to tear or become soggy.
2. Use a Thermometer for Frying:
Maintain the oil temperature at 350°F (175°C). If the oil is too hot, the spring rolls will brown too quickly and not cook evenly inside.
3. Avoid Overcrowding the Pan:
Fry in small batches to maintain the oil temperature and achieve even crispiness.
4. Roll Tightly but Not Too Tight:
Ensure the spring rolls are rolled snugly to prevent them from falling apart while frying, but avoid rolling too tight as this can cause the wrapper to burst.
5. Drain on Paper Towels:
This helps remove excess oil, keeping the spring rolls crispy.
Storage and Reheating Tips
- Storage: Place any leftover spring rolls in an airtight container lined with paper towels to absorb excess moisture. Store in the refrigerator for up to 3 days.
- Reheating: To maintain crispiness, reheat spring rolls in the oven at 350°F (175°C) for 10-12 minutes or in an air fryer at 375°F (190°C) for 5-7 minutes. Avoid microwaving as it can make the wrappers soggy.
Frequently Asked Questions (FAQs)
1. Can I bake the spring rolls instead of frying them?
Yes, you can bake them at 400°F (200°C) for 15-20 minutes or until golden and crispy. Brush them with a little oil before baking for a better texture.
2. Can I use a different type of meat?
Absolutely! Ground turkey, chicken, or even plant-based meat substitutes work well.
3. Can I make these ahead of time?
Yes, you can prepare and assemble the rolls ahead of time. Store them covered in the refrigerator and fry them just before serving.
4. What can I use instead of spring roll wrappers?
Egg roll wrappers or even phyllo dough can be a substitute, but cooking times may vary.
5. How do I prevent the wrappers from tearing?
Keep the wrappers covered with a damp cloth to prevent them from drying out and becoming brittle.
6. Can I freeze the spring rolls?
Yes, freeze uncooked spring rolls in a single layer on a baking sheet. Once frozen, transfer them to a freezer bag for up to 3 months.
7. What dipping sauces go well with these spring rolls?
Apart from the suggested dipping sauce, try BBQ sauce, ranch dressing, or even a spicy sriracha mayo.
8. Can I make this recipe gluten-free?
Yes, use gluten-free spring roll wrappers and ensure all other ingredients, like ketchup and mustard, are gluten-free.
9. What’s the best way to keep them warm for a party?
Place them in a low oven (200°F / 93°C) on a wire rack over a baking sheet to keep them warm and crispy.
10. Can I add vegetables to the filling?
Certainly! Chopped onions, bell peppers, or even spinach would be delicious additions.
11. Is there a way to reduce the calories in this recipe?
Opt for baking instead of frying and use lean ground beef or ground turkey.
12. How do I make them spicier?
Add diced jalapeños to the filling or a dash of hot sauce for extra heat.
13. Can I use pre-cooked bacon?
Yes, pre-cooked bacon works just as well and saves time.
14. Can I skip the pickles?
Sure, but the pickles add a nice tangy contrast to the savory filling.