
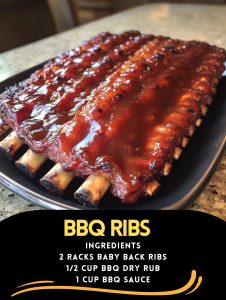
Succulent BBQ Ribs
Indulge in the smoky, tender goodness of these Succulent BBQ Ribs, perfect for a weekend gathering or a comforting family dinner. This recipe brings together the rich flavors of a homemade or store-bought BBQ dry rub with a luscious BBQ sauce, creating a dish that is as satisfying as it is easy to prepare. Whether you’re a seasoned cook or just starting out, these ribs are sure to impress with their fall-off-the-bone tenderness and irresistible flavor.
Ingredients Overview
- Baby Back Ribs (2 racks): The star of the show, baby back ribs are prized for their tender meat and slightly curved shape that allows for even cooking. These ribs are perfect for absorbing all the flavors of the rub and sauce while becoming incredibly tender in the oven.
- BBQ Dry Rub (1/2 cup): A blend of spices that can be store-bought or homemade. This rub is essential for adding depth of flavor, infusing the meat with smoky, sweet, and spicy notes.
- BBQ Sauce (1 cup): The finishing touch that adds a sticky, sweet, and tangy glaze to the ribs. Whether you opt for a store-bought favorite or whip up your own, the sauce caramelizes beautifully during the final bake.
Step-by-Step Cooking Instructions
Prepare the Ribs:
Step 1: Remove the Membrane
- Begin by preparing the ribs. Lay each rack flat on a clean surface, bone-side up. Using a sharp knife, carefully loosen the thin, silvery membrane from one corner of the ribs. Once you have a good grip, gently pull it off in one piece. Removing this membrane ensures that your ribs will be tender and allows the flavors to penetrate the meat more deeply.
Step 2: Pat Dry and Season
- Pat the ribs dry with paper towels. This step is crucial for ensuring that the dry rub adheres well. Generously rub each rack with the BBQ dry rub, making sure to cover all sides evenly. Let the ribs sit for about 15 minutes to absorb the flavors.
Preheat the Oven:
Step 3: Set the Temperature
- Preheat your oven to 300°F (150°C). This low and slow cooking method is key to achieving tender ribs that practically fall off the bone.
Bake the Ribs:
Step 4: Prepare for Baking
- Line a baking sheet with aluminum foil, allowing for some overhang to wrap the ribs. Place the seasoned ribs on the foil, bone-side down. Cover them with another sheet of foil, sealing the edges to create a packet. This traps the moisture, helping to tenderize the meat as it cooks.
Step 5: Bake Low and Slow
- Place the baking sheet in the preheated oven and bake the ribs for 2.5 to 3 hours. The slow cooking process allows the connective tissue in the ribs to break down, resulting in a tender, juicy finish.
Apply the BBQ Sauce:
Step 6: Sauce the Ribs
- After the initial bake, carefully remove the ribs from the oven. Increase the oven temperature to 375°F (190°C). Uncover the ribs and generously brush them with your BBQ sauce, coating both sides.
Step 7: Final Bake
- Return the ribs to the oven, uncovered, and bake for an additional 30 minutes. This step allows the sauce to caramelize, creating a sticky, flavorful glaze on the ribs.
Serve:
Step 8: Rest and Serve
- Once done, let the ribs rest for 5 minutes before slicing. Serve with extra BBQ sauce on the side, and enjoy these deliciously tender ribs with your favorite sides.
Valuable Cooking Tips
Tip 1: Choose Fresh Ribs
- For the best results, select ribs that are fresh, with a good balance of meat and fat.
Tip 2: Homemade Rubs for Personalization
- If you have the time, make your own dry rub to customize the flavor profile of the ribs. Include spices like paprika, brown sugar, garlic powder, and cayenne for a kick.
Tip 3: Use a Meat Thermometer
- Ensure the ribs reach an internal temperature of at least 190°F (88°C) for ultimate tenderness.
Tip 4: Double Layer of Foil
- Using two layers of foil when wrapping the ribs prevents any juices from leaking out, keeping the ribs moist.
Tip 5: Let the Rub Sit
- Allowing the rub to sit on the ribs for at least 15 minutes before baking enhances the flavor.
Tip 6: Add Liquid Smoke
- For an extra smoky flavor, consider adding a few drops of liquid smoke to the BBQ sauce.
Tip 7: Grill Finish for Extra Char
- If you prefer a charred finish, grill the ribs for a few minutes after baking.
Tip 8: Resting is Key
- Always let the ribs rest after cooking to let the juices redistribute throughout the meat.
Tip 9: Sticky BBQ Sauce
- Reapply the BBQ sauce halfway through the final bake for an extra sticky finish.
Tip 10: Side Suggestions
- Serve with classic sides like coleslaw, cornbread, or baked beans for a complete meal.
Tip 11: Leftover Magic
- Use leftover ribs in sandwiches or wraps for a quick meal the next day.
Tip 12: Freezing for Later
- Ribs freeze well, so make an extra batch and freeze for up to 3 months.
Tip 13: Slow Cooker Alternative
- If you prefer, you can cook the ribs in a slow cooker on low for 6-8 hours, then finish with the BBQ sauce in the oven.
Tip 14: Broil for Extra Crisp
- Broil the ribs for the last 2 minutes to get a crispy top.
Tip 15: Choose the Right BBQ Sauce
- Whether sweet, tangy, or spicy, the BBQ sauce you choose greatly influences the final flavor.
Tip 16: Bone-side Down
- Always cook ribs bone-side down to allow the fat to melt into the meat, keeping it moist.
Tip 17: Pairing Drinks
- Pair with a cold beer or a glass of iced tea for a classic combo.
Tip 18: Garnish for Freshness
- A sprinkle of fresh herbs like cilantro or parsley adds a pop of color and freshness.
Tip 19: Control the Spice
- Adjust the spice level in your rub or sauce to suit your family’s preferences.
Tip 20: Experiment with Flavors
- Don’t be afraid to experiment with different spices or sauces to make the recipe your own.
Storage and Reheating Tips
Storage: Store leftover ribs in an airtight container in the refrigerator for up to 3 days.
Reheating: Reheat in a 300°F (150°C) oven, covered with foil, for about 20 minutes. You can also reheat in a microwave, though the oven method will help retain the texture.
20 Frequently Asked Questions
Q1: Can I use spare ribs instead of baby back ribs?
A1: Yes, but spare ribs are larger and may require a longer cooking time.
Q2: What’s the best way to remove the membrane?
A2: Use a paper towel to grip the membrane better, and pull it off in one piece.
Q3: Can I make this recipe on the grill?
A3: Absolutely! Cook over indirect heat for 2-3 hours, then finish with BBQ sauce over direct heat.
Q4: What if I don’t have a BBQ rub?
A4: You can make your own with common spices like paprika, garlic powder, and brown sugar.
Q5: How do I know when the ribs are done?
A5: The meat should be tender and pull away from the bones easily, or use a meat thermometer to check for 190°F.
Q6: Can I use a different type of meat?
A6: Pork ribs are traditional, but beef ribs can also be used with adjusted cooking times.
Q7: Is it okay to marinate the ribs overnight?
A7: Yes, marinating overnight enhances the flavor, but it’s not necessary.
Q8: What’s the best way to serve ribs?
A8: Serve with classic sides like cornbread, coleslaw, and baked beans.
Q9: Can I add liquid smoke to the recipe?
A9: Yes, adding a bit of liquid smoke to the sauce or rub gives an extra smoky flavor.
Q10: How can I get a crispy top?
A10: Broil the ribs for the last 2-3 minutes of cooking for a crispy finish.
Q11: Should I wrap the ribs in foil for the entire cooking time?
A11: Wrapping the ribs helps keep them moist, but unwrapping them for the final bake allows the sauce to caramelize.
Q12: Can I freeze leftover ribs?
A12: Yes, wrap them tightly in foil and store in a freezer bag for up to 3 months.
Q13: What type of BBQ sauce should I use?
A13: Use your favorite store-bought or homemade sauce, depending on your preference.