
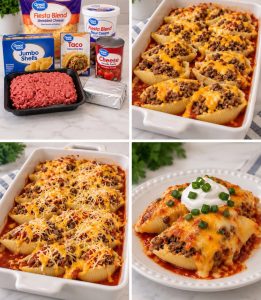
Cheesy Taco Stuffed Shells – Creamy, Cheesy Mexican-Inspired Pasta Bake
If you love tacos, cheesy pasta, and easy family dinners, these Cheesy Taco Stuffed Shells are about to become a new favorite! Jumbo pasta shells are filled with seasoned ground beef, creamy cream cheese, tangy sour cream, and melted Fiesta blend cheese, then nestled in tomato sauce and baked until hot, bubbly, and irresistibly delicious.
This recipe brings together everything you love about taco night and combines it with the comfort of a cheesy pasta casserole. Each shell is packed with savory taco-seasoned beef and a creamy cheese filling, while the melted cheese on top creates the perfect finishing touch.
Best of all, these stuffed shells are simple enough for a weeknight dinner but impressive enough to serve when family and friends come over. Add your favorite taco toppings, such as fresh cilantro, diced tomatoes, green onions, and extra sour cream, to make every serving even more delicious.
Whether you’re feeding hungry kids, planning a casual dinner, or looking for a new twist on taco night, these Cheesy Taco Stuffed Shells are guaranteed to bring big flavor to the table!
Why You’ll Love These Cheesy Taco Stuffed Shells
- Two comfort-food favorites in one: Enjoy the flavors of tacos in a hearty pasta bake.
- Creamy, cheesy filling: Cream cheese and sour cream make the taco beef rich and delicious.
- Easy family dinner: Everyday ingredients come together in a simple, satisfying meal.
- Perfect for meal prep: Prepare the shells ahead of time and bake when you’re ready.
- Customizable toppings: Add tomatoes, cilantro, jalapeños, green onions, or extra sour cream.
- Great for leftovers: Reheat individual portions for an easy lunch or dinner.
- Crowd-pleasing flavor: The combination of seasoned beef, pasta, tomato sauce, and melted cheese is hard to resist.
Recipe Overview
- Prep Time: 20 minutes
- Cook Time: 35–45 minutes, including pasta preparation
- Total Time: Approximately 55–65 minutes
- Servings: 6
- Course: Dinner, Main Course
- Cuisine: Mexican-Inspired, American Comfort Food
- Cooking Method: Stovetop and Oven
- Difficulty: Easy
Ingredients for Cheesy Taco Stuffed Shells
1. Jumbo Pasta Shells
One box of jumbo pasta shells forms the base of this recipe. Their large shape makes them perfect for holding the creamy taco beef filling.
Cook the shells until al dente, following the package instructions. Slightly firm shells are easier to stuff and less likely to tear during assembly.
2. Ground Beef
One pound of ground beef provides the hearty, savory filling. Ground beef with a moderate fat content works well, but be sure to drain excess grease after browning.
You can substitute ground turkey or chicken if you prefer a lighter variation.
3. Taco Seasoning
One packet of taco seasoning adds classic Tex-Mex flavor with a blend of spices and herbs.
Use your favorite store-bought packet or homemade taco seasoning. If your seasoning contains a lot of salt, taste the filling before adding extra.
4. Water
Half a cup of water helps the taco seasoning coat the beef and form a flavorful sauce.
Allow it to simmer until the mixture thickens slightly before adding the creamy ingredients.
5. Tomato Sauce
One 15-ounce can of tomato sauce creates a flavorful base for the stuffed shells and helps keep the pasta moist while baking.
Spread it evenly across the bottom of the baking dish so the shells have a delicious tomato layer underneath.
6. Cream Cheese
Eight ounces of softened cream cheese create a rich, creamy filling that balances the spices in the taco beef.
Let the cream cheese soften at room temperature before cooking so it blends smoothly into the meat.
7. Fiesta Blend Cheese
Two cups of shredded Fiesta blend cheese provide a delicious combination of melty cheeses.
You’ll mix half a cup into the beef filling and sprinkle the remaining 1½ cups over the stuffed shells before baking.
8. Sour Cream
Half a cup of sour cream adds tanginess and makes the filling extra creamy.
Full-fat sour cream provides a rich texture, although reduced-fat sour cream can also work.
9. Salt and Black Pepper
Add salt and pepper to taste, keeping in mind that taco seasoning and shredded cheese may already contain plenty of salt.
10. Optional Toppings
Finish the shells with your favorite taco-inspired toppings:
- Extra sour cream
- Chopped green onions
- Diced tomatoes
- Fresh cilantro
You can also add sliced jalapeños, avocado, or a little hot sauce if you enjoy extra flavor and heat.
Complete Ingredients List
- 1 box jumbo pasta shells
- 1 lb ground beef
- 1 packet taco seasoning
- ½ cup water
- 1 can (15 oz) tomato sauce
- 8 oz cream cheese, softened
- 2 cups shredded Fiesta blend cheese
- ½ cup sour cream
- Salt and pepper, to taste
Optional toppings:
- Extra sour cream
- Chopped green onions
- Diced tomatoes
- Fresh cilantro
Kitchen Equipment You’ll Need
- A large pot for cooking pasta
- A large skillet
- A colander
- A 9 × 13-inch baking dish
- A mixing spoon or spatula
- Measuring cups and spoons
- Aluminum foil
- A spoon for filling the pasta shells
How to Make Cheesy Taco Stuffed Shells
Follow these easy steps to prepare a bubbling, cheesy pasta bake with a delicious taco-inspired filling.
Step 1: Preheat the Oven
Preheat your oven to 375°F (190°C).
Lightly grease a 9 × 13-inch baking dish with cooking spray or a thin layer of oil. This helps prevent sticking and makes serving easier.
Set the dish aside while you prepare the pasta and filling.
Step 2: Cook the Jumbo Pasta Shells
Bring a large pot of salted water to a boil.
Add the jumbo pasta shells and cook according to the package directions until al dente. Avoid overcooking them because they’ll continue to soften slightly during baking.
Drain the shells carefully in a colander and allow them to cool until comfortable enough to handle.
Arrange them in a single layer on a lightly oiled tray or plate if necessary to prevent sticking.
Helpful tip: Cook a few extra shells in case some split during boiling. Intact shells are much easier to fill.
Step 3: Brown the Ground Beef
Place a large skillet over medium heat.
Add the ground beef and cook, breaking it apart with a spoon or spatula, until it’s browned and fully cooked.
Drain excess grease from the skillet before continuing.
For food safety, ground beef should reach an internal temperature of 160°F (71°C).
Step 4: Add the Taco Seasoning
Sprinkle the taco seasoning over the cooked beef.
Pour in the ½ cup of water and stir thoroughly to combine.
Allow the mixture to simmer for 3–5 minutes, stirring occasionally, until the liquid reduces and the beef is coated in a flavorful taco sauce.
Reduce the heat to low before adding the creamy ingredients.
Step 5: Make the Creamy Taco Beef Filling
Add the softened cream cheese to the skillet.
Stir until it begins to melt into the seasoned beef. Add the sour cream and ½ cup of the shredded Fiesta blend cheese.
Continue stirring gently until the filling is creamy and the ingredients are evenly combined.
If the mixture seems too thick, you can add a small splash of water. If it seems too loose, let it cook gently for another minute or two.
Taste the filling and adjust the salt and pepper if needed.
Remove the skillet from the heat.
Step 6: Prepare the Tomato Sauce Base
Spread the entire 15-ounce can of tomato sauce evenly across the bottom of the prepared baking dish.
This creates a flavorful base for the stuffed shells and helps prevent the bottoms from drying out during baking.
If you’d like a little extra flavor, you can stir a pinch of Italian seasoning or garlic powder into the tomato sauce.
Step 7: Stuff the Pasta Shells
Take one cooked shell at a time and carefully open it with your fingers.
Spoon the creamy taco beef mixture into the shell, filling it generously without forcing the pasta apart.
Arrange each stuffed shell in the baking dish with the open side facing upward.
Continue until you’ve used the filling and arranged the shells in a single layer.
If you have a little extra filling, spoon it into any gaps between the shells.
Step 8: Add the Remaining Cheese
Sprinkle the remaining 1½ cups of shredded Fiesta blend cheese evenly over the stuffed shells.
Make sure the cheese covers the tops so it melts into a delicious golden layer.
For extra flavor, you can add a small sprinkle of taco seasoning over the cheese, but keep it light to avoid making the dish too salty.
Step 9: Bake Covered
Cover the baking dish tightly with aluminum foil.
Bake for 15 minutes at 375°F (190°C).
Covering the dish helps retain moisture and allows the shells to heat through while the cheese begins to melt.
Step 10: Uncover and Finish Baking
Remove the foil carefully, watching for escaping steam.
Return the baking dish to the oven and bake for another 5–10 minutes, until the cheese is melted and bubbly and the filling is hot throughout.
If you prefer a lightly browned cheese topping, you can broil the dish briefly at the end, watching it closely so the cheese doesn’t burn.
Step 11: Rest and Garnish
Remove the dish from the oven and let the stuffed shells rest for about 5 minutes.
This brief resting period helps the filling settle and makes the shells easier to serve.
Sprinkle with chopped green onions, fresh cilantro, and diced tomatoes. Add dollops of sour cream if desired.
Step 12: Serve and Enjoy
Serve the Cheesy Taco Stuffed Shells warm, spooning some of the tomato sauce from the bottom of the dish over each portion.
Pair them with a fresh salad, Mexican-style rice, or roasted vegetables for a satisfying dinner.
Every bite delivers tender pasta, savory taco beef, creamy cheese filling, and a bubbly cheese topping!
Expert Tips for Perfect Taco Stuffed Shells
- Cook the shells al dente: Overcooked pasta can split when stuffed.
- Soften the cream cheese: Room-temperature cream cheese blends more smoothly.
- Drain the beef: Too much grease can make the filling oily.
- Let the taco mixture thicken: A less watery filling is easier to stuff into shells.
- Use a spoon for filling: A small spoon makes it easier to fill each shell neatly.
- Don’t overfill: Fill generously without stretching or tearing the pasta.
- Keep the shells in one layer: This helps them heat evenly.
- Cover during the first stage of baking: Foil helps prevent the cheese from drying out.
- Check the center before serving: The filling should be hot throughout.
- Rest before serving: A few minutes makes the dish easier to portion.
Delicious Variations and Substitutions
1. Chicken Taco Stuffed Shells
Replace the ground beef with cooked, shredded chicken or ground chicken. Combine it with taco seasoning and the creamy cheese mixture for a delicious alternative.
2. Ground Turkey Stuffed Shells
Use ground turkey instead of beef. Cook it thoroughly and follow the remaining recipe as written.
3. Spicy Taco Shells
Add diced jalapeños, cayenne pepper, or hot taco seasoning to the filling. Top with sliced jalapeños for extra heat.
4. Black Bean Taco Shells
Stir drained and rinsed black beans into the cooked beef mixture for extra texture and a heartier filling.
5. Corn and Taco Shells
Add drained corn kernels to the filling. Corn adds a subtle sweetness that complements the savory beef and taco spices.
6. Extra-Cheesy Taco Shells
Mix a little shredded Monterey Jack or cheddar into the filling alongside the Fiesta blend cheese.
7. Enchilada-Style Stuffed Shells
Replace the tomato sauce with red enchilada sauce for a deeper, more pronounced Mexican-inspired flavor.
8. Salsa Taco Stuffed Shells
Use a thick salsa in place of some of the tomato sauce, or stir a few spoonfuls into the filling. Choose a thicker salsa to prevent excess moisture.
9. Vegetarian Taco Stuffed Shells
Replace the ground beef with seasoned black beans, lentils, or a plant-based ground meat alternative. Drain excess liquid so the filling stays thick enough to stuff.
10. Extra Vegetable Version
Add finely diced bell peppers, onions, or spinach to the beef mixture. Cook vegetables until tender and remove excess moisture before combining with the cream cheese.
What to Serve with Cheesy Taco Stuffed Shells
These stuffed shells are hearty enough to serve on their own, but the right side dishes can turn dinner into a complete feast.
- Mexican rice: A classic side that complements the taco seasoning.
- Cilantro-lime rice: Fresh citrus and herbs balance the creamy filling.
- Black beans: A simple, flavorful addition.
- Corn salad: Sweet corn and fresh vegetables provide a refreshing contrast.
- Garden salad: Crisp lettuce and tomatoes lighten up the meal.
- Guacamole: Creamy avocado adds freshness.
- Tortilla chips and salsa: Great for a fun Tex-Mex-inspired dinner.
- Roasted zucchini: A simple vegetable side that pairs well with the rich cheese.
- Sautéed peppers and onions: Add color and extra flavor.
- Fresh pico de gallo: Bright tomatoes, onions, cilantro, and lime make a delicious topping.
For a family dinner, serve the shells with Mexican rice and a simple green salad. For a party, arrange them on a platter with bowls of salsa, guacamole, and sour cream.
Make-Ahead Instructions
Cheesy Taco Stuffed Shells are an excellent make-ahead dinner.
You can prepare the filling, cook the pasta, and assemble the dish ahead of time.
- Cook the shells until al dente and let them cool.
- Prepare the taco beef filling.
- Spread the tomato sauce in the baking dish.
- Stuff the shells and arrange them in the dish.
- Add the shredded cheese on top.
- Cover the dish and refrigerate promptly.
For the best quality, bake within 24 hours.
Because the dish will be cold when it goes into the oven, it may need additional baking time. Use an oven-safe dish, and if transferring a refrigerated glass dish directly to the oven, follow the manufacturer’s guidance to avoid thermal shock.
Bake until the center is hot throughout. If the cheese browns before the filling is heated, cover the dish loosely with foil.
How to Store Leftovers
Allow leftovers to cool slightly, then transfer them to an airtight container or cover the baking dish securely.
- Refrigerator: Store for 3–4 days at 40°F (4°C) or below.
- Freezer: Freeze for up to 2–3 months for best quality.
- Room temperature: Refrigerate within 2 hours of cooking, or within 1 hour if the temperature is above 90°F (32°C).
Store the shells with some tomato sauce to help prevent the pasta from drying out.
For easy lunches, divide leftovers into individual portions before refrigerating.
How to Reheat Cheesy Taco Stuffed Shells
Oven Method
Preheat the oven to 350°F (175°C).
Place the shells in an oven-safe dish and add a spoonful of tomato sauce or water if they appear dry. Cover with foil and heat until warmed through.
Remove the foil near the end if you want to refresh the cheesy topping.
Microwave Method
Place one or two shells in a microwave-safe dish.
Add a little sauce, cover loosely, and heat in short intervals of 30–60 seconds until the filling is hot throughout. The exact time depends on the number of shells and your microwave.
Air Fryer Method
For a small portion, use an oven-safe dish that fits inside the air fryer. Heat at approximately 325°F (160°C), checking regularly and covering if the cheese browns too quickly.
Because the filling is enclosed in pasta, make sure the center is thoroughly heated rather than judging by the surface alone.
Reheat leftovers to an internal temperature of 165°F (74°C).
Can You Freeze Taco Stuffed Shells?
Yes! These shells are freezer-friendly, making them useful for busy weeks.
To Freeze Before Baking
Assemble the shells in a freezer-safe baking dish, cover tightly, and freeze before baking. For the best quality, use within 2–3 months.
Thaw overnight in the refrigerator before baking, then cook until the filling is hot throughout. You can bake from frozen in an appropriate oven-safe dish, but the cooking time will be significantly longer.
To Freeze After Baking
Allow the cooked shells to cool, then transfer them to freezer-safe containers with some sauce.
Freeze in individual or family-sized portions. Thaw in the refrigerator and reheat thoroughly before serving.
Frequently Asked Questions
1. Can I use a different type of pasta?
Jumbo pasta shells work best because they provide enough space for the filling. Smaller shells or manicotti may work, but the stuffing process and baking time will differ.
2. Can I make taco stuffed shells ahead of time?
Yes. Assemble the dish, cover it, and refrigerate promptly. For the best quality, bake within 24 hours.
3. Can I use ground turkey instead of ground beef?
Absolutely. Ground turkey is a good alternative. Cook it thoroughly before adding the taco seasoning and creamy ingredients.
4. How do I keep the pasta shells from tearing?
Cook the shells until al dente, drain them carefully, and let them cool slightly before filling. Cooking a few extra shells is helpful in case some split.
5. Why is my filling too runny?
The beef mixture may contain too much liquid or grease. Simmer the seasoned beef until the water reduces, drain excess grease, and then add the cream cheese and sour cream.
6. Can I use homemade taco seasoning?
Yes. Homemade taco seasoning works beautifully. Use enough to flavor the beef, and adjust the salt to your taste.
7. What cheese works best?
Fiesta blend cheese, cheddar, Monterey Jack, and Mexican-style shredded cheese blends all work well. Choose cheeses that melt smoothly.
8. Can I use salsa instead of tomato sauce?
Yes. A thick salsa can replace some or all of the tomato sauce. Be aware that salsa may contain more liquid or salt, so adjust the seasoning accordingly.
9. Can I make this recipe spicy?
Yes. Add jalapeños, red pepper flakes, hot sauce, or spicy taco seasoning to the filling.
10. Can I make it vegetarian?
Yes. Replace the beef with black beans, lentils, or plant-based ground meat. Season the filling well and drain excess moisture.
11. Do I need to cover the baking dish?
Yes, during the first 15 minutes of baking. Removing the foil for the final 5–10 minutes allows the cheese to melt and become bubbly.
12. How do I know when the stuffed shells are done?
The cheese should be melted and bubbly, and the filling should be hot throughout. If using a thermometer, check that the center reaches 165°F (74°C) when reheating or finishing a previously cooked filling.
13. Can I freeze the stuffed shells?
Yes. Freeze assembled, unbaked shells or fully cooked leftovers in airtight, freezer-safe packaging for up to 2–3 months for best quality.
14. How long do leftovers last in the refrigerator?
Store leftovers in airtight containers for 3–4 days at 40°F (4°C) or below.
15. What can I use instead of sour cream?
Plain Greek yogurt can provide a similar tangy flavor. Add it over low heat and stir gently to prevent the mixture from becoming grainy.
16. Can I add vegetables to the filling?
Yes. Finely diced bell peppers, onions, corn, and spinach are excellent options. Cook watery vegetables first and drain excess liquid.
17. What should I serve with taco stuffed shells?
Mexican rice, black beans, fresh salad, guacamole, salsa, or roasted vegetables all pair nicely with the cheesy shells.
18. Why did my cheese brown too quickly?
Your oven may run hot, or the dish may be positioned too close to the heating element. Cover loosely with foil if the cheese browns before the filling is hot.
19. Can I make this recipe without cream cheese?
Yes, although the filling will be less rich. You can use extra shredded cheese and a little Greek yogurt or sour cream, stirring carefully to create a creamy mixture.
20. Are Cheesy Taco Stuffed Shells good for meal prep?
Definitely. Prepare a batch, divide the cooked shells into portions, and refrigerate or freeze them. They’re a convenient option for make-ahead lunches and dinners.
20 Tips and Secrets for the Best Cheesy Taco Stuffed Shells
- Cook extra shells. A few extra pieces help if some tear during boiling.
- Keep the pasta al dente. Slightly firm shells are easier to fill and bake.
- Cool the shells slightly. This makes them easier to handle without burning your fingers.
- Soften the cream cheese. Soft cream cheese blends more evenly with the beef.
- Drain excess grease. This prevents an oily filling.
- Reduce the taco liquid. Let the water simmer down before adding dairy.
- Use freshly shredded cheese if convenient. It can melt smoothly, although pre-shredded cheese is also convenient.
- Season gradually. Taco seasoning and cheese already contribute salt.
- Spread the tomato sauce evenly. This helps prevent dry pasta bottoms.
- Fill shells generously. Add enough filling to make each shell satisfying without forcing it apart.
- Keep shells in one layer. This promotes even heating.
- Use foil for the first stage. It helps retain moisture while the filling heats.
- Uncover at the end. This allows the cheese topping to become bubbly.
- Rest before serving. A few minutes makes the shells easier to portion.
- Add fresh toppings last. Cilantro, tomatoes, and green onions taste freshest when added after baking.
- Choose thick salsa or sauce. Too much liquid can make the pasta watery.
- Prepare individual portions. This makes weekday lunches and reheating easier.
- Label freezer containers. Include the date so you can track storage time.
- Reheat with a little sauce. A spoonful helps keep the pasta moist.
- Customize your toppings. Avocado, jalapeños, lime, and extra sour cream let everyone personalize their serving.
Final Thoughts
These Cheesy Taco Stuffed Shells are the perfect combination of creamy pasta comfort and bold taco-night flavor. Jumbo shells are filled with seasoned ground beef, cream cheese, sour cream, and melted Fiesta blend cheese, then baked in tomato sauce until hot, bubbly, and irresistible.
They’re easy to customize, convenient to prepare ahead, and delicious enough to become a regular part of your dinner rotation.
Serve them with fresh cilantro, diced tomatoes, green onions, and a dollop of sour cream for a fun, flavorful meal everyone can enjoy.
Save this recipe for your next taco night and get ready for a cheesy, comforting dinner that the whole family will ask for again! 🌮🧀