
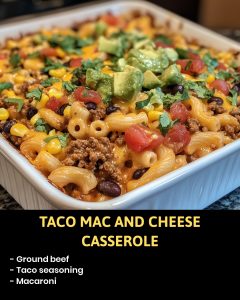
Taco Mac and Cheese Casserole
This Taco Mac and Cheese Casserole is where two comfort food worlds collide! With the rich creaminess of mac and cheese combined with the bold, spicy flavors of a taco, it’s a family-friendly meal that’s as fun to make as it is to eat. Loaded with seasoned ground beef, gooey cheese, fresh veggies, and a zesty salsa kick, it’s the perfect casserole for weeknight dinners, potlucks, or even game day feasts.
Ingredients Overview
- Ground Beef: A rich and savory base, seasoned with taco spices to bring out those classic Mexican flavors.
- Taco Seasoning: This is your shortcut to vibrant, bold flavors. You can use a store-bought packet or make your own for extra control over spice levels.
- Macaroni: The ultimate comfort food pasta. Its nooks and crannies catch all the saucy goodness of the casserole.
- Cheese: A hearty layer of shredded cheese gives that melty, gooey finish. Cheddar, Monterey Jack, or a Mexican cheese blend works great here.
- Tomatoes: Adds a fresh, juicy element to the dish. You can use fresh diced tomatoes or canned for convenience.
- Green Chilies: These mild chilies add a slight kick and depth of flavor without overwhelming heat.
- Onion: For a touch of sweetness and crunch, finely diced onion blends well into the casserole.
- Sour Cream: Adds creaminess and a tangy contrast to the taco spices.
- Salsa: The salsa adds zest and moisture to the casserole. Go for mild, medium, or hot depending on your family’s preference.
- Black Beans: Adds protein and a delightful texture to the dish.
- Corn: For sweetness and a pop of color, corn is the perfect veggie addition.
- Cilantro: Fresh cilantro brightens the dish with its citrusy flavor.
- Avocado: Creamy avocado slices on top provide a cool, buttery finish to balance out the spiciness.
Step-by-Step Cooking Instructions
1. Prepare the Taco Meat
Start by heating a skillet over medium heat. Cook the ground beef until browned, breaking it apart as it cooks. Once browned, add taco seasoning according to the package instructions, stirring to coat the meat evenly. Set the seasoned meat aside.
2. Cook the Macaroni
While the beef is cooking, prepare your macaroni. Cook according to the package instructions, then drain and set aside. Make sure not to overcook the macaroni, as it will cook further in the oven.
3. Mix the Casserole Base
In a large mixing bowl, combine the cooked macaroni, taco meat, diced tomatoes, green chilies, onion, sour cream, salsa, black beans, corn, and fresh cilantro. Stir everything together until well combined. This mixture is where all the flavors come together!
4. Assemble the Casserole
Transfer the mixture into a greased casserole dish, spreading it out evenly. Top with shredded cheese—be generous here, as this will form the deliciously melty and golden crust.
5. Bake to Perfection
Bake the casserole in a preheated oven at 350°F for about 20-25 minutes, or until the cheese is fully melted and bubbly. You want that top layer to be golden brown and irresistible!
6. Garnish and Serve
Once out of the oven, let the casserole rest for a few minutes before serving. Top with fresh avocado slices and more cilantro if desired. The creamy avocado balances the spice and richness of the casserole, adding a refreshing touch to each bite.
Helpful Tips for a Seamless Cooking Experience
Tip #1: Use Lean Ground Beef
Opt for lean ground beef (85/15) or even ground turkey to reduce excess grease and make the dish a little lighter.
Tip #2: Spice It Up!
If you like extra heat, add a chopped jalapeño to the casserole mixture, or sprinkle in a little cayenne pepper with the taco seasoning.
Tip #3: Swap the Macaroni
You can easily substitute elbow macaroni with shells, rotini, or even gluten-free pasta to suit your preferences.
Tip #4: Make It Creamier
For an extra creamy texture, stir in some shredded cheese directly into the macaroni mixture before topping it with the final cheese layer.
Tip #5: Use Homemade Salsa
If you have time, making fresh salsa can elevate the flavor, adding a more authentic and vibrant taste to the casserole.
Storage and Reheating Tips
Storage:
After the casserole has cooled, store any leftovers in an airtight container in the refrigerator for up to 3 days.
Reheating:
To reheat individual portions, the microwave works well—just cover with a damp paper towel to keep it from drying out. If reheating the entire casserole, cover it with foil and heat it in the oven at 350°F until warmed through, about 15-20 minutes.
Freezing:
You can freeze this casserole for later! Simply prepare it up to the baking stage, cover tightly with plastic wrap and aluminum foil, and freeze for up to 3 months. When you’re ready to bake, thaw overnight in the refrigerator and bake as directed.
20 Frequently Asked Questions (FAQs)
1. Can I use ground turkey instead of beef?
Yes, ground turkey is a great lean alternative to beef and will still taste delicious.
2. Can I make this vegetarian?
Absolutely! Just leave out the meat and add more beans, corn, or even quinoa for extra protein.
3. What kind of cheese should I use?
Cheddar, Monterey Jack, or a Mexican blend works best for melting and flavor.
4. Can I make this spicier?
Add extra green chilies, jalapeños, or a dash of hot sauce to the mixture.
5. Can I use a different pasta shape?
Yes, shells, rotini, or any other pasta shape works just as well.
6. Can I add more vegetables?
Yes, diced bell peppers, zucchini, or even spinach would be great additions.
7. Can I make this ahead of time?
Yes, assemble the casserole and refrigerate it unbaked for up to 24 hours.
8. How do I make this gluten-free?
Use gluten-free pasta and ensure your taco seasoning is gluten-free.
9. What can I use instead of sour cream?
Greek yogurt is a great substitute for sour cream, adding protein and creaminess.
10. Can I use fresh tomatoes instead of canned?
Yes, just dice them and drain any excess liquid to avoid a soggy casserole.
11. Can I use homemade taco seasoning?
Absolutely! Homemade taco seasoning is a great way to control the spice levels and flavors.
12. How long will leftovers last?
Stored in the fridge, leftovers will stay fresh for up to 3 days.
13. Can I freeze the casserole?
Yes, this casserole freezes well for up to 3 months. Just thaw before baking.
14. What can I use instead of black beans?
You can use pinto beans, kidney beans, or even lentils for a different flavor.
15. Can I make this dairy-free?
Use dairy-free cheese and sour cream alternatives to make this dairy-free.
16. Can I add rice instead of pasta?
Sure! Cooked rice can be used in place of the macaroni for a more taco-rice feel.
17. What can I serve with this casserole?
A side of guacamole, tortilla chips, or a fresh green salad pairs perfectly.
18. Can I bake this in smaller portions?
Yes, you can divide the mixture into individual ramekins or smaller dishes for single servings.
19. Can I use frozen corn?
Yes, frozen corn works just as well as canned, just thaw and drain before adding.
20. Can I add olives?
Absolutely! Black olives or sliced green olives add a nice salty touch.
20 Secrets for Achieving Culinary Perfection with This Recipe
Secret #1: Use freshly grated cheese for the best melt and flavor—pre-shredded cheese can have additives that prevent smooth melting.
Secret #2: Toast the taco seasoning in the pan for 30 seconds to deepen its flavor before adding water.
Secret #3: Stir in a tablespoon of cream cheese with the sour cream for a richer, creamier filling.
Secret #4: Add a squeeze of lime juice to the salsa before mixing it in for a bright, fresh twist.
Secret #5: Sprinkle crushed tortilla chips on top of the cheese layer before baking for added crunch.
Secret #6: Use fire-roasted tomatoes for a smoky depth of flavor.
Secret #7: Toss the cooked macaroni in a little olive oil to prevent it from sticking together while you prep the other ingredients.
Secret #8: For an even cheesier bite, stir a handful of shredded cheese into the macaroni mixture before baking.
Secret #9: If you’re a cilantro fan, mix some into the cheese topping before baking for added freshness.